Example Asbestos Removal Projects in Lakewood, Washington

Each example runs from the first test or survey through the removal steps, the days on site and about what the job would cost. Nearly 6 in every 10 Lakewood homes were built before 1980 and more than half are rented, so the examples include 1970s houses and a single-wide, an apartment building, and older houses in Steilacoom and Parkland.

These are not past jobs, and no client or address stands behind them. Each one combines the age of homes around Lakewood, the usual order of work and current price ranges, so you can see what a job involves before you ask for a quote.

Survey of an old basement before a laundry and bathroom go in

Example project
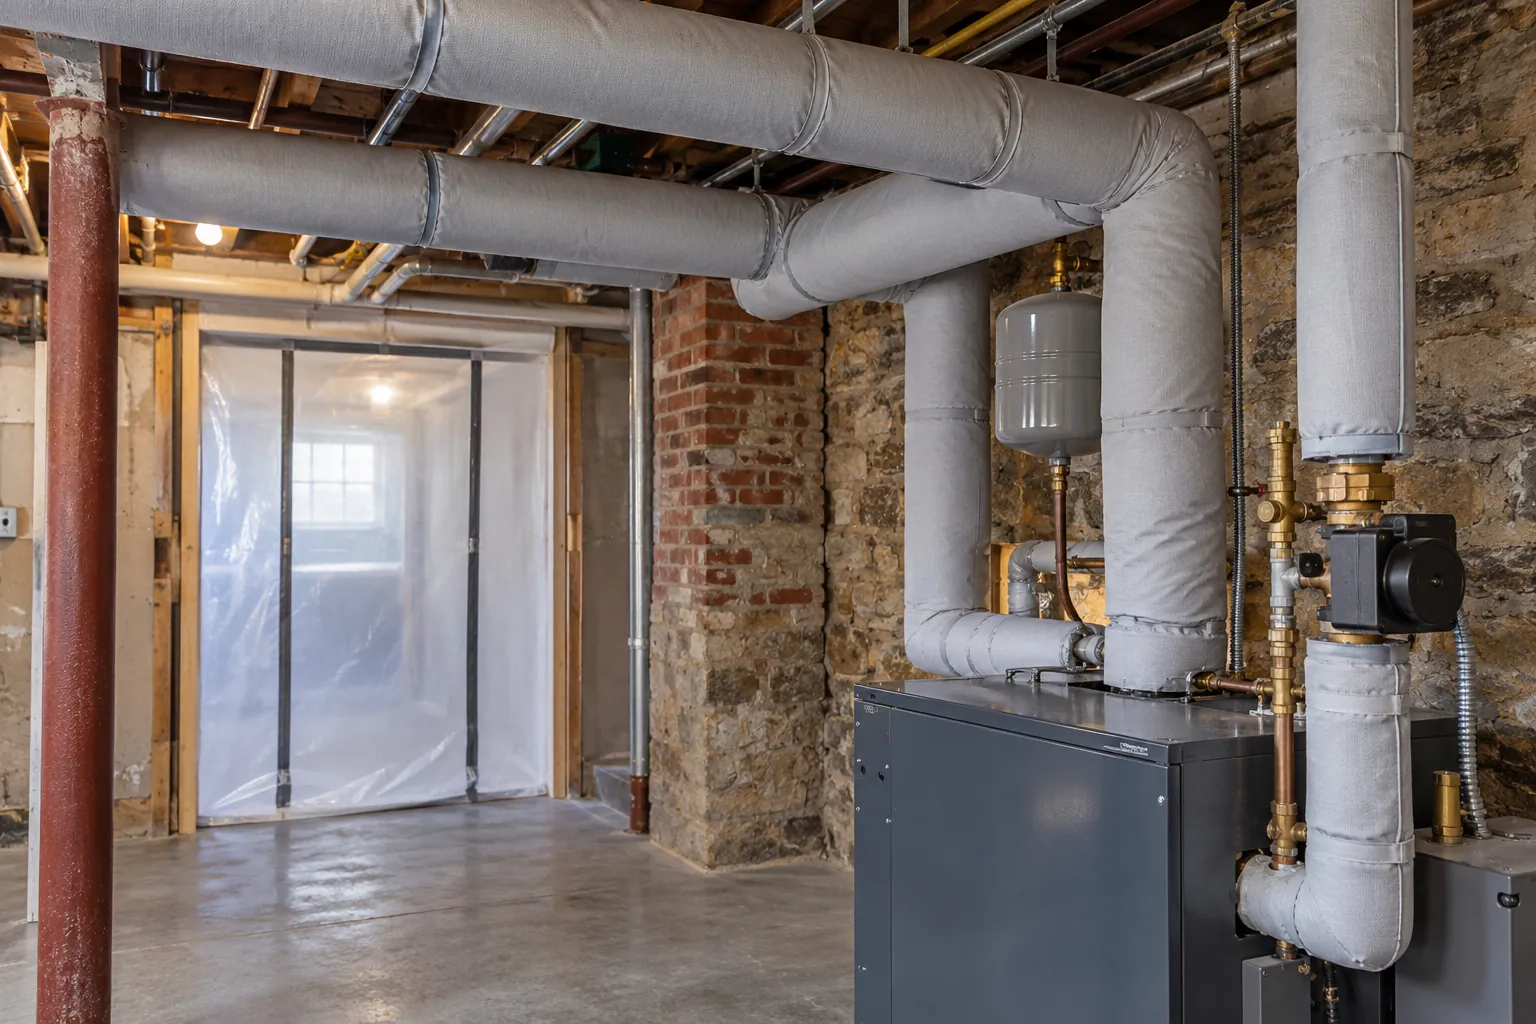
Basement with stone and brick walls, a newer gray boiler, pipes in gray insulation jackets, open joists and a plastic zipper door behind
Home
1910s two-story house in Steilacoom with a stone and brick foundation and a newer boiler
Original request
Add a laundry room and a bathroom in the basement
Testing
About 10 samples from the old partition wall, the ceiling above it, the floor paint and the window putty
Found
Asbestos in the plaster patching on the old partition wall
Clear
No asbestos in the stone and brick walls, the mortar, the floor paint or the newer pipe jackets
Timeline
One visit by the inspector, then a written report within a few days
Estimated testing cost
$750

Scope of work

A visit by an accredited inspector, about ten small samples with each spot patched, lab fees and a written report with quantities the plumber and the demolition crew can use. Removal of the positive plaster is priced separately.

Project overview

In this example, the owners of a 1910s house in Steilacoom want a laundry room and a bathroom in the basement. The plumber will cut the concrete floor and open the old partition wall, so the owners ask for a survey first.

Only the plaster patching on the old partition tests positive. The stone and brick walls, the floor paint and the newer pipe jackets are clear, so the removal is one wall and the plumber knows what to leave closed.

The goal

The goal is a short list of what the basement work would disturb, with one wall to clear before the plumber starts.

Process

  1. Before the visit Photos and a rough plan of the new rooms, so the inspector samples only what the work will touch.
  2. Visit About ten samples from the partition, the ceiling, the floor and the windows, each bag labeled.
  3. A few days later Lab results and a written report with the positive wall measured.
  4. Then The positive plaster is priced and removed before the plumber starts cutting.

Planning right

  • Old houses get a different answer in each room, so sample every material the plan will cut.
  • Give the plumber and the electrician a copy of the report before they open anything.
  • Pipe jackets and boiler parts replaced in a later update are sampled too, not assumed clear.
  • A wall or floor left closed and untouched can stay as it is.
Get a free quoteMore about asbestos testing and surveys

Painted texture coming loose on two ceilings in a townhouse

Example project

Home
1970s two-story end townhouse in Lakewood, lived in by its owners
Original request
Bare, smooth ceilings in the living and dining rooms, then new paint
Testing
Lab tests of the texture and the paint over it found asbestos
Area
About 230 sq ft of ceiling across the two rooms
Work
Rooms emptied and sealed, texture soaked and scraped, after a notice to the clean air agency
Timeline
Notice, then two working days
Cost
$3,200

Scope of work

A lab test of the texture, a notice to the clean air agency, both rooms emptied and sealed with plastic, the fans and light fixtures taken down, the painted texture soaked and scraped off into sealed bags, a HEPA vacuum and wet wipe, and disposal. A skim coat and paint are extra.

Project overview

In this example, the paint on the living and dining room ceilings of a 1970s townhouse is flaking, and small pieces of texture drop onto the carpet. The owners want a smooth, repainted ceiling and ask for a test first.

The texture tests positive. The two rooms add up to more than 48 sq ft, so a notice goes in first, and the texture comes off in one pass per room, soaked and bagged.

The goal

The goal is two bare ceilings with no loose texture overhead, ready for a skim coat and new paint.

Process

  1. First visit A sample of the texture taken from beside a flaking spot; the paint layers and the rooms measured.
  2. Before work Notice filed; the rooms emptied and the fans and fixtures taken down.
  3. Day one The living room sealed, the painted texture soaked and scraped into bags.
  4. Day two The dining room the same way, then the final clean and the plastic folded inward.

Planning right

  • Keep the heating and cooling system off while the rooms are open.
  • Flaking texture on the carpet is not swept dry. Ask before cleaning it up.
  • Decide on a skim coat or new board before removal, so the crew leaves the right surface.

Get a free quoteMore about popcorn ceiling removal

Old adhesive under a kitchen and hall floor of a single-wide

Example project

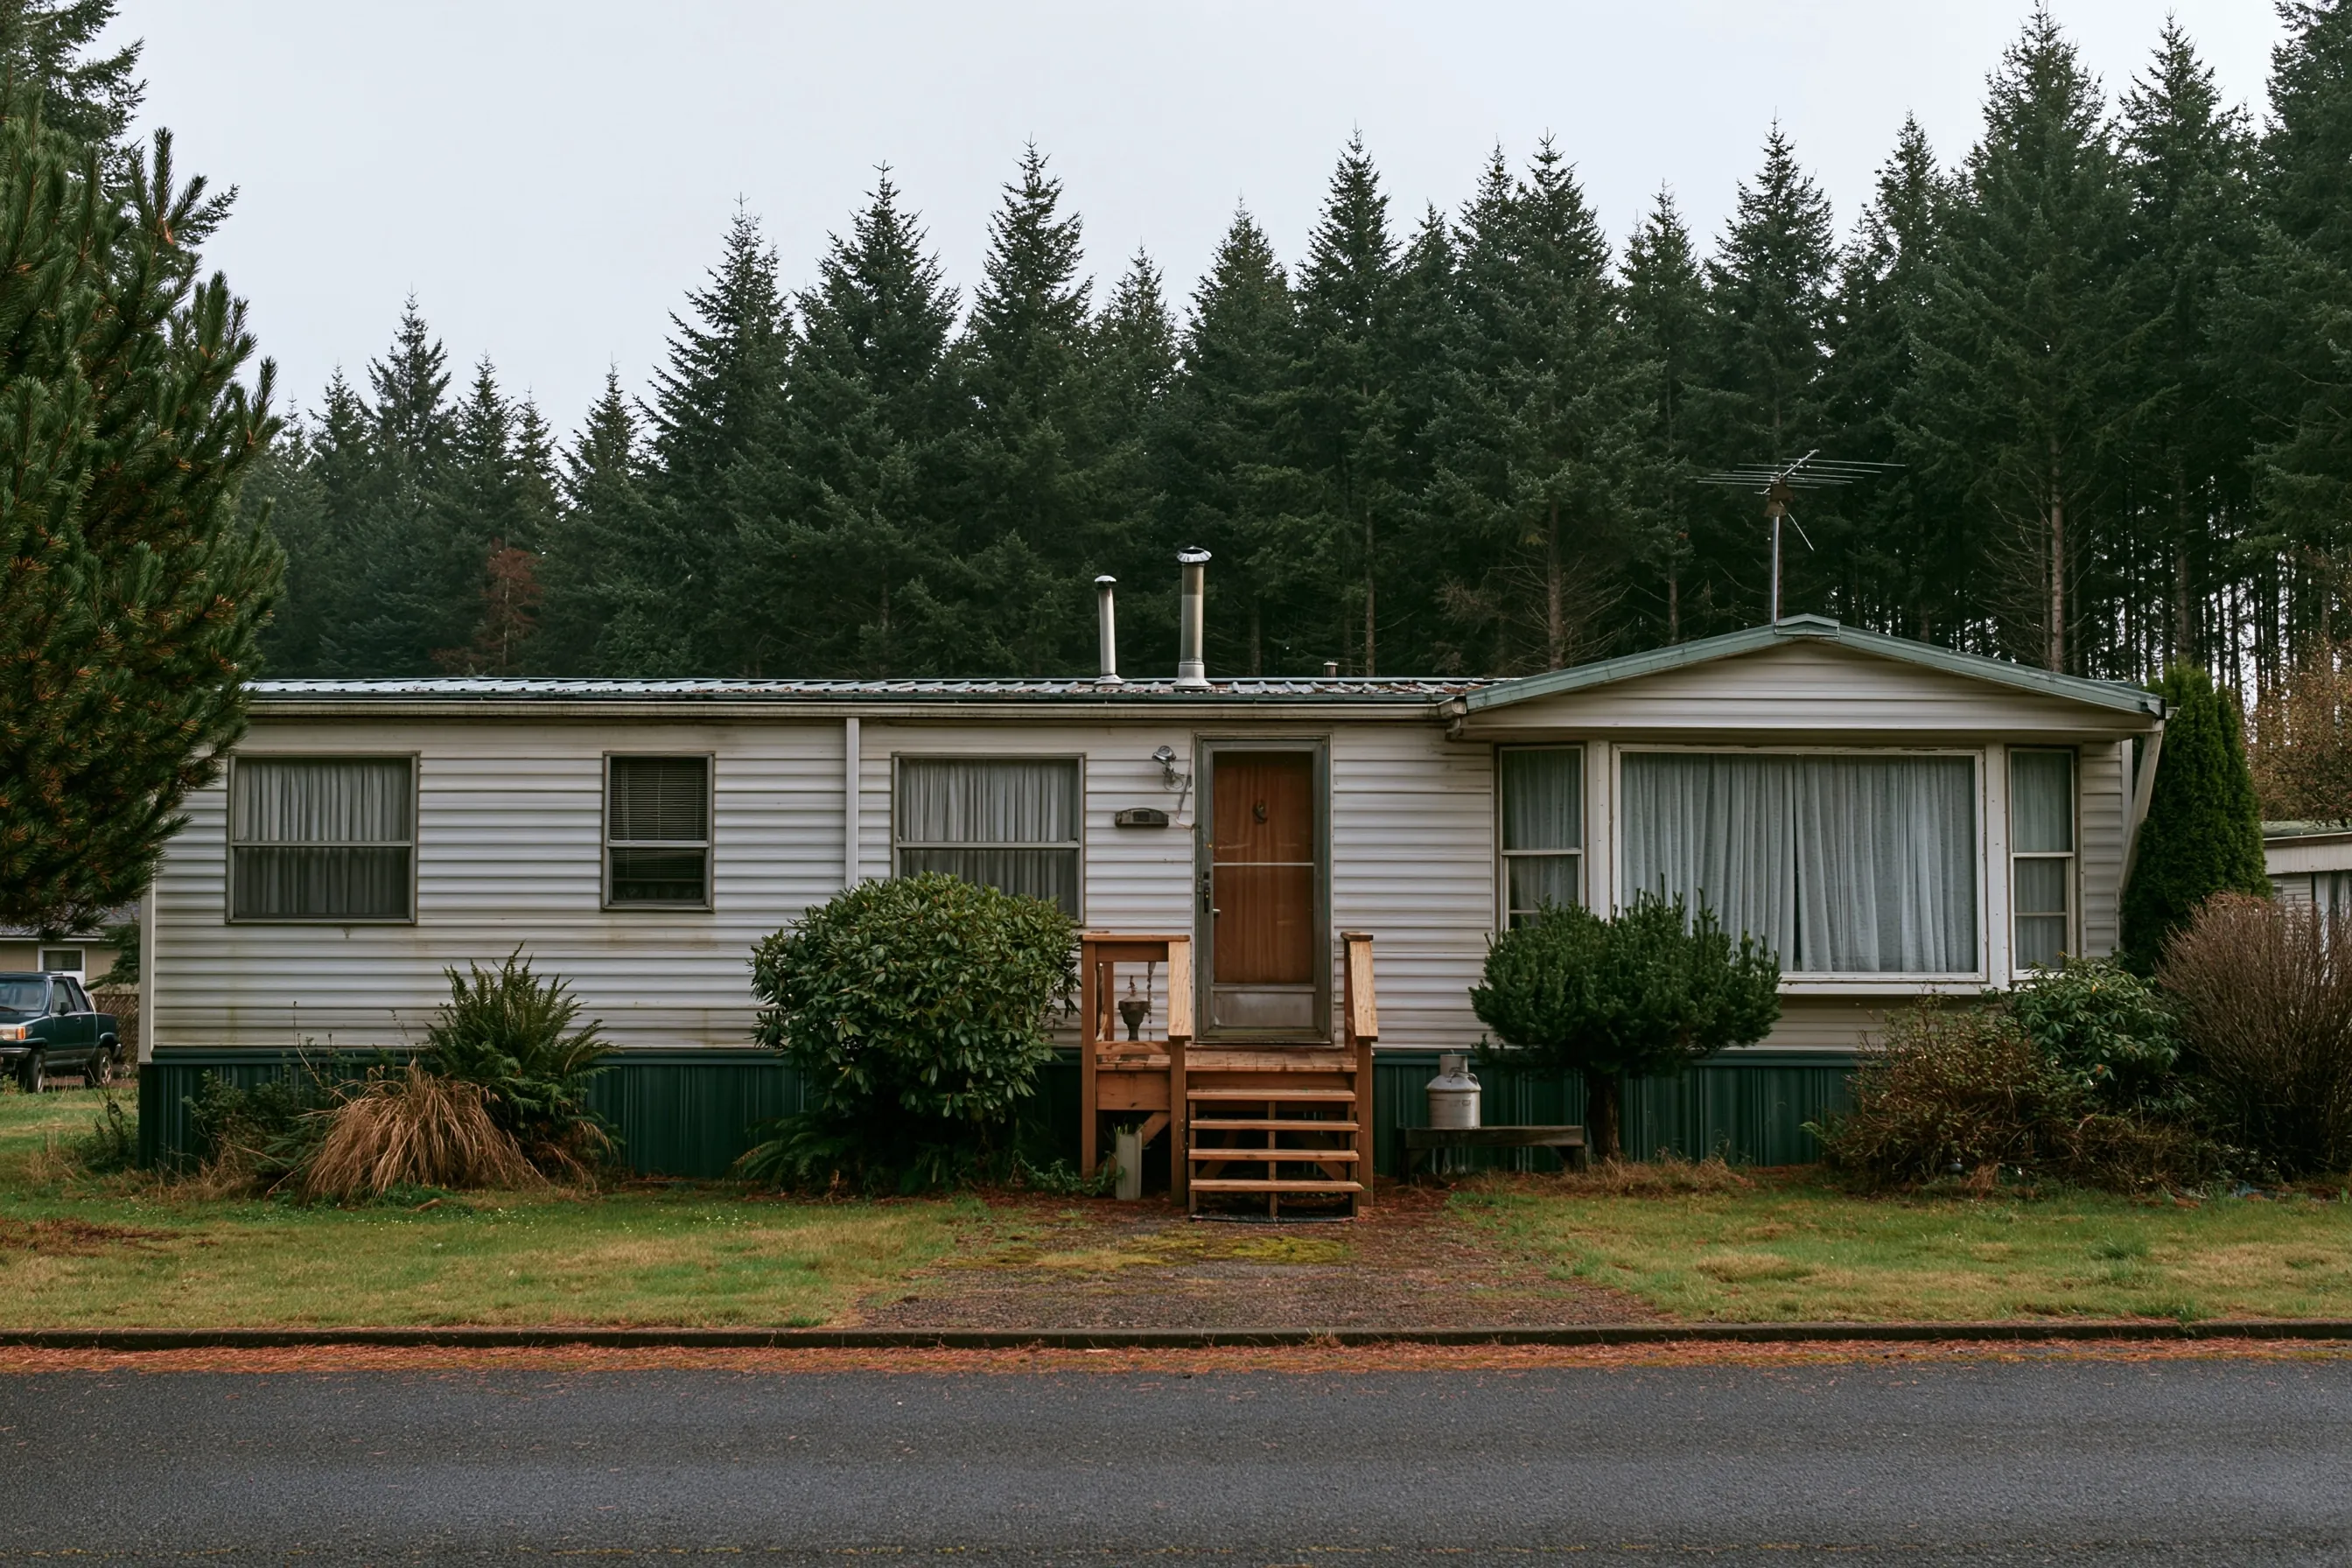
Light gray single-wide home with green skirting, wood front steps and tall evergreens behind it
Home
1970s single-wide on its own lot in Lakewood, with wood front steps and tall evergreens behind
Original request
One new vinyl plank floor through the kitchen and the hall, for new owners
Testing
The sheet vinyl and the black glue under it sampled apart in the kitchen and the hall
Found
Asbestos in the black glue under the kitchen vinyl only
Clear
No asbestos in the sheet vinyl, its backing or the hall glue
Area
About 160 sq ft of kitchen and hall floor
Timeline
Two days of work before the plank floor goes in
Cost
$2,400

Scope of work

Separate samples of the vinyl and the glue, the kitchen and hall sealed with plastic and a filtered air unit, the vinyl lifted, the black glue taken off the floor deck wet, sealed and labeled bags, a HEPA vacuum and disposal. The new plank floor and any deck repair are extra.

Project overview

In this example, new owners of a 1970s single-wide in Lakewood want one vinyl plank floor through the kitchen and the hall. The old sheet vinyl is glued down, so the installer asks what the glue is before scraping it.

Only the black glue under the kitchen vinyl tests positive. The glue is scraped wet and not sanded, so the deck stays intact, and the hall comes up without any special steps beyond the same containment.

The goal

The goal is a clean, bare floor deck through the kitchen and hall, with the old glue gone before the new floor goes in.

Process

  1. First visit Samples of the vinyl and the glue in both rooms; the floor measured and the deck checked.
  2. Day one Rooms sealed, filtered air unit started, the vinyl lifted and the glue scraped wet in the kitchen.
  3. Day two The hall lifted, the deck vacuumed and wiped, the plastic folded inward and bagged.
  4. Then The installer lays the plank floor over a clean deck.

Planning right

  • Never sand or grind old glue to level a floor.
  • Floor decks in older homes may be thin, so check the deck before the plank floor goes in.
  • Keep the lab report with the papers for the home.
  • Waste from a Lakewood address goes to an authorized disposal site, not the Tacoma landfill.

Get a free quoteMore about floor tile and sheet vinyl removal

Cement shingle wall repaired after a limb came down in a storm

Example project

Home
1950s one-story house in Parkland with gray cement shingles on its side wall
Original request
Repair the side wall that a falling limb opened in a winter storm
Testing
Samples of the shingles and the felt behind them; the shingles are positive
Area
About 300 sq ft of the damaged side wall
Work
Shingles kept wet and taken off whole after a notice to the clean air agency
Timeline
Notice first, then two days on the wall before repairs start
Cost
$3,800

Scope of work

Samples of the shingles and the building paper, a notice to the clean air agency, the ground and plants covered with sheeting, the shingles wetted and pried off whole, wrapped, a HEPA vacuum of the wall and ground, and the haul to an authorized disposal site. New sheathing, siding and paint are extra.

Project overview

In this example, a limb comes down on the side wall of a 1950s house in Parkland and breaks the shingles over a wide patch, with the wood behind them wet. The carpenter needs the damaged part of the wall bare.

The shingles test positive, and cement shingles count as friable. About 300 sq ft comes off, so a notice goes in first. They are kept wet and lifted off whole instead of broken, and the carpenter starts on a clean wall.

The goal

The goal is a bare, clean side wall for the carpenter, with every damaged cement shingle out and bagged.

Process

  1. First visit Samples of the shingles and the paper behind them; the damaged area outlined and measured.
  2. Before work Notice filed; sheeting laid over the ground and the planting along the wall.
  3. Day one Shingles wetted and pried off whole, wrapped and stacked in sealed containers.
  4. Day two The wall and the ground vacuumed, the sheeting rolled in, the waste hauled out.

Planning right

  • A tarp over the opening keeps the wall dry until the crew arrives.
  • Pick a dry stretch for the removal, so the open wall is not rained on.
  • Broken pieces on the ground are not swept. They go in the same wrapped load.
  • Replacement siding is a separate permit question, so check before ordering material.

Get a free quoteMore about siding and roofing removal

Ceilings and floors cleared from a rambler before a builder tears it down

Example project

Home
1960s single-story house in Lakewood, empty and sold to a builder
Original request
Clear the lot for a new house
Testing
An accredited inspector samples every room, the roof and the siding, about 25 samples
Found
Asbestos in the sprayed ceilings and in the old tile and glue on two floors
Clear
No asbestos in the walls, the siding or the roofing
Timeline
Survey, then the two notices with the 10-day wait, then about five days of removal
Cost
$13,000

Scope of work

Removal of every positive material before demolition, about 900 sq ft of ceiling texture and about 400 sq ft of floor tile and glue, with rooms sealed one at a time, sealed and labeled bags, an air check, and the haul to an authorized disposal site. The survey and the wrecking work are not included.

Project overview

In this example, a builder buys an empty 1960s house in Lakewood to tear it down. The demolition application lists the notice to the clean air agency, and a survey of the whole house has to come first.

The walls, siding and roofing are clear. The asbestos is in the ceiling texture and in the old floors, so those rooms are cleared one at a time while the 10-day wait for the demolition notice runs.

The goal

The goal is a house with its positive ceilings and floors cleared, so the builder keeps the demolition date.

Process

  1. Week one Survey of the whole house; lab results and a written report with every positive material measured.
  2. Next The removal notice and the demolition notice go in, and the 10-day wait starts.
  3. Removal days Rooms sealed one at a time; texture soaked and scraped, tile lifted, glue scraped wet.
  4. Final day Air check, the last bags hauled, and the keys passed to the wrecking crew.

Planning right

  • Tacoma's landfill takes only waste from the City of Tacoma, so Lakewood waste goes elsewhere in the county.
  • The survey covers every structure being demolished, not only the house.
  • Keep the survey and the notices with the demolition application.
  • Plan the haul early, since friable waste has 10 days to reach the disposal site.

Get a free quoteMore about pre-demolition abatement

Stairwell and hall ceilings removed in an occupied apartment building

Example project

Building
1970s two-story apartment building in Lakewood, 12 units, with two inside stairwells
Original request
New lights and smooth ceilings in the stairwells and the halls
Testing
An accredited inspector surveys the common areas, about 14 samples
Found
Asbestos in the sprayed ceiling texture of both stairwells and the halls
Clear
No asbestos in the stair treads, the wall board or the light fixture bases
Area
About 700 sq ft of ceiling
Timeline
Survey, then the notice, then about five days of removal, one stairwell at a time
Cost
$8,500

Scope of work

A survey of the common areas, a notice to the clean air agency, a sealed work area with a filtered air unit around one stairwell and hall at a time, a certified crew, the texture soaked and scraped into sealed bags, an air check before each area reopens, and disposal. New ceilings and lights are extra.

Project overview

In this example, the owner of a 1970s apartment building in Lakewood plans new lights and smooth ceilings in the stairwells and halls, with tenants staying in their units. A rented building has no owner-occupant option, so an accredited inspector surveys the common areas first.

The sprayed texture overhead tests positive. A certified crew takes it down one stairwell and hall at a time, so tenants always have one clear way out, and each area is checked before it reopens.

The goal

The goal is bare ceilings in every stairwell and hall, finished while tenants stay in their homes.

Process

  1. Survey About 14 samples from the stairwells, halls and entries; a written report with the ceilings measured.
  2. Before work Notice filed; tenants told which stairwell closes on which days.
  3. Days one to four One stairwell and its hall sealed at a time, texture soaked and removed, bags sealed.
  4. Last day Air check, final clean, and each area reopened for the lighting crew.

Planning right

  • Post a notice for tenants with the dates and the second way out.
  • The measured ceiling area decides the notice, so the survey counts every hall and landing.
  • Larger sections of a building, or a whole building, are priced after a visit.
  • File the survey where the manager can find it when a unit is worked on later.

Get a free quoteMore about rental and apartment abatement

Request a free asbestos removal quote

Say which material worries you, what work is planned, whether the owner lives in the building or it is rented, and where it is. We'll get back to you soon with an estimate or any questions we have. Estimates are free and there's no obligation.

Call (253) 367-4626

Call (253) 367-4626